

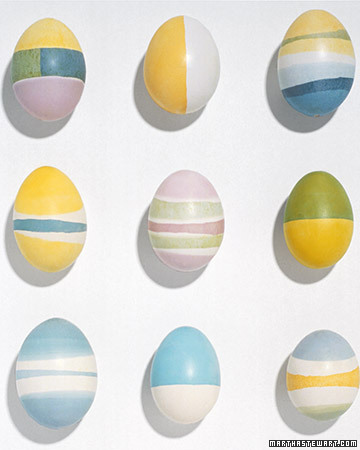
For thousands of years, Ukrainians have created elaborately patterned eggs called pysanky using a wax-resist process. Wax is applied to an egg, which is then dipped in colored dyes. When completed, the wax is melted off, revealing all the colors beneath. Updated and simplified, the same technique can be used to produce these soft watercolor patterns.
Tools and Materials
Food coloring
Beeswax
Eggs
Pot (for melting beeswax)
Bowls and spoons (for dyes)
Cookie sheet
Wax paper
Paper towels
Wax-Resist Dyeing How-To
1. To make a striped egg, dye a raw or hard-boiled egg pale yellow (for richer colors, increase the proportion of coloring to water). Remove and let dry.

2. Melt beeswax in a pot. Dip both ends of the egg in wax; this will prevent that area from absorbing the next color.

3. Place the egg in the green dye for about one minute, then remove and let dry. Dip both ends of the egg deeper in the wax than before, leaving a narrow unwaxed band around the middle of the egg.

4. Place the egg in dark blue dye to color the middle stripe. When finished, place the egg in a 250-degree oven on a cookie sheet lined with waxed paper for about 5 minutes. Take the egg out and wipe off melted wax with a paper towel. If you used a raw egg, let egg cool and carefully blow out contents. To make a half-colored egg, hold an egg partially submerged in a strong dye for about a minute.To create eggs with bands of white, dip-dye both ends, then dip each end in the wax to cover the dyed area plus a stripe of white beyond them, then proceed as above.

From Martha Stewart Living April/May 1994

No comments:
Post a Comment