I figured it was a good day to try a new craft.


 e ever mentioned this before, but in addition to being super mom (cough cough) and blogging I also crochet hats and photo props. Ive been lucky enough to team up with a fabulous photographer (Michelle Collis Photography) to get some great pics. You can see more on my facebook page at http://tinyurl.com/7c9rehm

This Little Helper Tower is adjustable for the size of your child and even has a few amendments for those who might be at the top of their class (like an arched entryway!). The piece is beautiful and will save you hundreds of dollars at the store and can be put together in a weekend.
Check out the full tutorial over at Ana White's website and get busy building your own.


 All in all, It was a really great weekend. I am so glad we took the time to reconnect as a family, and just spend some time together.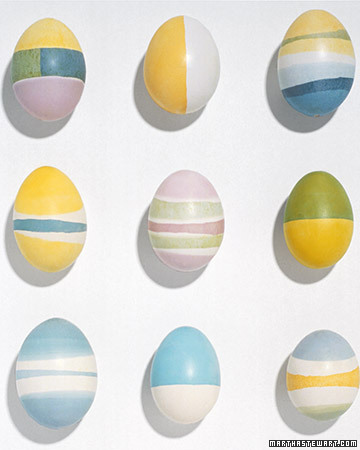
For thousands of years, Ukrainians have created elaborately patterned eggs called pysanky using a wax-resist process. Wax is applied to an egg, which is then dipped in colored dyes. When completed, the wax is melted off, revealing all the colors beneath. Updated and simplified, the same technique can be used to produce these soft watercolor patterns.
Tools and Materials
Food coloring
Beeswax
Eggs
Pot (for melting beeswax)
Bowls and spoons (for dyes)
Cookie sheet
Wax paper
Paper towels
Wax-Resist Dyeing How-To
1. To make a striped egg, dye a raw or hard-boiled egg pale yellow (for richer colors, increase the proportion of coloring to water). Remove and let dry.
2. Melt beeswax in a pot. Dip both ends of the egg in wax; this will prevent that area from absorbing the next color.
3. Place the egg in the green dye for about one minute, then remove and let dry. Dip both ends of the egg deeper in the wax than before, leaving a narrow unwaxed band around the middle of the egg.
4. Place the egg in dark blue dye to color the middle stripe. When finished, place the egg in a 250-degree oven on a cookie sheet lined with waxed paper for about 5 minutes. Take the egg out and wipe off melted wax with a paper towel. If you used a raw egg, let egg cool and carefully blow out contents. To make a half-colored egg, hold an egg partially submerged in a strong dye for about a minute.To create eggs with bands of white, dip-dye both ends, then dip each end in the wax to cover the dyed area plus a stripe of white beyond them, then proceed as above.
From Martha Stewart Living April/May 1994

Body Scrubs
You need only four ingredients to make these moisturizing exfoliants. The base can be made from either Epsom salts or sugar, depending on whether you want a large or fine grain. Color the scrubs with shades that are in keeping with some of the scents you use -- pink with grapefruit, for example, or green with eucalyptus. Makes about 2 1/3 cups.
Tools and Materials
2 cups Epsom salts or organic cane sugar
1 cup carrier oil
8 drops essential oil(s)
1 drop food coloring
Special equipment: plastic pipette, canning jars
Directions
1. Stir together Epsom salts or sugar and carrier oil in a bowl, mixing well.
2. Using pipette, add essential oil, 1 drop at a time. Add food coloring, and stir until color is even throughout. Spoon into canning jars.
3. Download clip-art labels, enlarging or reducing to fit top of canning jar if necessary. Print onto ink-jet bumper-sticker paper (which is designed to withstand water). Cut out the labels, and affix to clean jars.

These fragrant spheres for the bath (we scented ours with peppermint oil) are made by packing Epsom salts into a plastic mold. The bath "snowballs" can be tinted any color. You'll need 3 to 4 days to make the bath balls because of the drying time between steps. Makes 2 large or 4 small balls.
Tools and Materials
2 cups Epsom salts
2 tablespoons water
A few drops essential oil(s)
1 drop food coloring, plus more if desired
Special equipment: plastic pipette, large or small round bath-ball molds, storage jars
Directions
1. Stir together Epsom salts and water in a mixing bowl. Using pipette, add oil, 1 drop at a time, until strength of scent is to your liking. Add food coloring, 1 drop at a time, until desired shade is achieved; stir until color is even throughout.
2. Spoon a generous amount of mixture (more than necessary) into 1/2 of a bath-ball mold. Pack firmly. Repeat, packing mixture into second half of mold. Press pieces together until they connect. Remove top half of mold very carefully. Let bath ball stand, mold side down, overnight (set ball on an overturned jar lid to keep it from tipping over).
3. Remove mold carefully. Invert, and let ball dry completely, 2 to 3 days more. Transfer to jars.
 Bath Fizzies
Ice-cube trays serve as molds, giving the fizzies their shape. Using a flexible silicone model lets you slide the cubes out smoothly without breaking them.
Show off the colors of the bath fizzies in glass jars with screw tops, the kind used for storing sugar and flour. Pack each type of fizzy in a separate jar so the scents won't meld. Write the name of the scent on a vellum tag (choose a shade that matches the fizzies), and punch a hole in the top. Thread the tag with ribbon, and tie it around the jar.
Citric acid, a common food additive, is available at wine-making-supply stores, some spice shops, and online. When citric acid is combined with baking soda and placed in water, a chemical reaction creates bubbles.
Makes 1 dozen (use 2 per bath)
Tools and Materials
1/2 cup citric acid
1 cup baking soda
3/4 cup cornstarch
1/4 cup organic cane sugar
About 6 drops food coloring
10 to 15 drops essential oil(s)
Special equipment: 2-ounce travel-size spray bottle, plastic pipette, silicone ice-cube tray, storage jars
Directions
1. Stir together citric acid, baking soda, and cornstarch in a glass measuring cup.
2. Pass mixture through a fine sieve or a flour sifter into a mixing bowl. Stir in sugar.
3. Fill spray bottle with water, and add food coloring. Spritz mixture lightly (it should become damp but not fizzy) until you can pack mixture with your hands.
4. Using pipette, add oil, 1 drop at a time, until strength of scent is to your liking. Using a metal spoon or your hands, mix ingredients until color is even throughout (mixture will begin to dry out; when this happens, spritz until packable again).
5. Spoon into ice-cube tray, pressing firmly. Let dry at room temperature overnight. Pop out of tray gently. Transfer to jars.
Happy Crafting
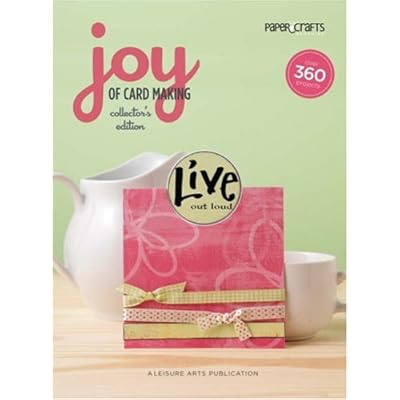 What do cooking and card making have in common? Apparently a lot.


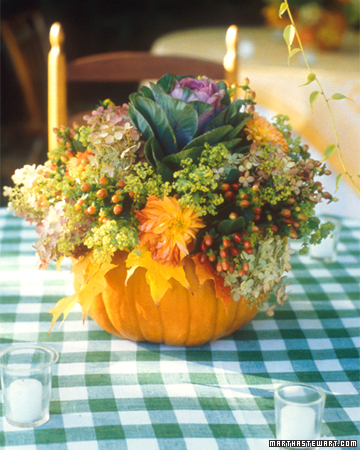
Pumpkin Vase
Pumpkins wear many hats this time of year, appearing in pies and soups as well as in centerpieces. Here's another use: Transform one into a colorful homemade vase.
1. Begin by selecting as round a pumpkin as you can find. Cut off the top, and scoop out the inside pulp and seeds Inside the pumpkin, place a plastic paint bucket or any plastic container that fits easily.
2. Place a cube of Oasis floral foam inside the container, thinning it to fit. Press the foam down to make it level, and drench it with water (enough so that a small pool collects at the bottom of the container). Arrange seasonal flowers, dried leaves, and berries as desired -- we used lady's mantle, dahlias, maple leaves, and hypericum berries.
 Flying place Cards
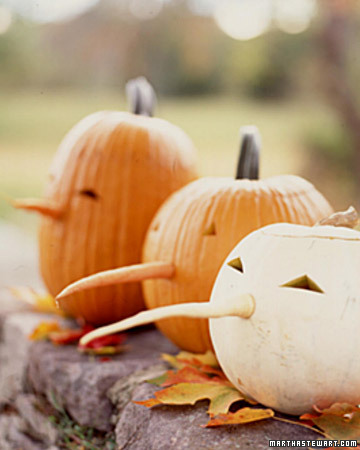
Whether you're carving, decorating, or using this classic fall gourd for Halloween inspiration, our pumpkin ideas will excite you all season.
If you don't have time to carve a complete face, a carrot will add some character to your jack-o-'lantern.


Black-green squashes, such as 'Table Ace' acorn, are carved with a linoleum cutter, which removes only the outer flesh.